Basic usage guide
This article aims to walk you through the basics of NextBusSG – viewing bus arrival timings and adding bus preferred services to your favorites. If you haven’t downloaded the app, click here. It’s strongly recommend that you go through the tutorial that comes when you first launch the app.
1. Viewing bus timings
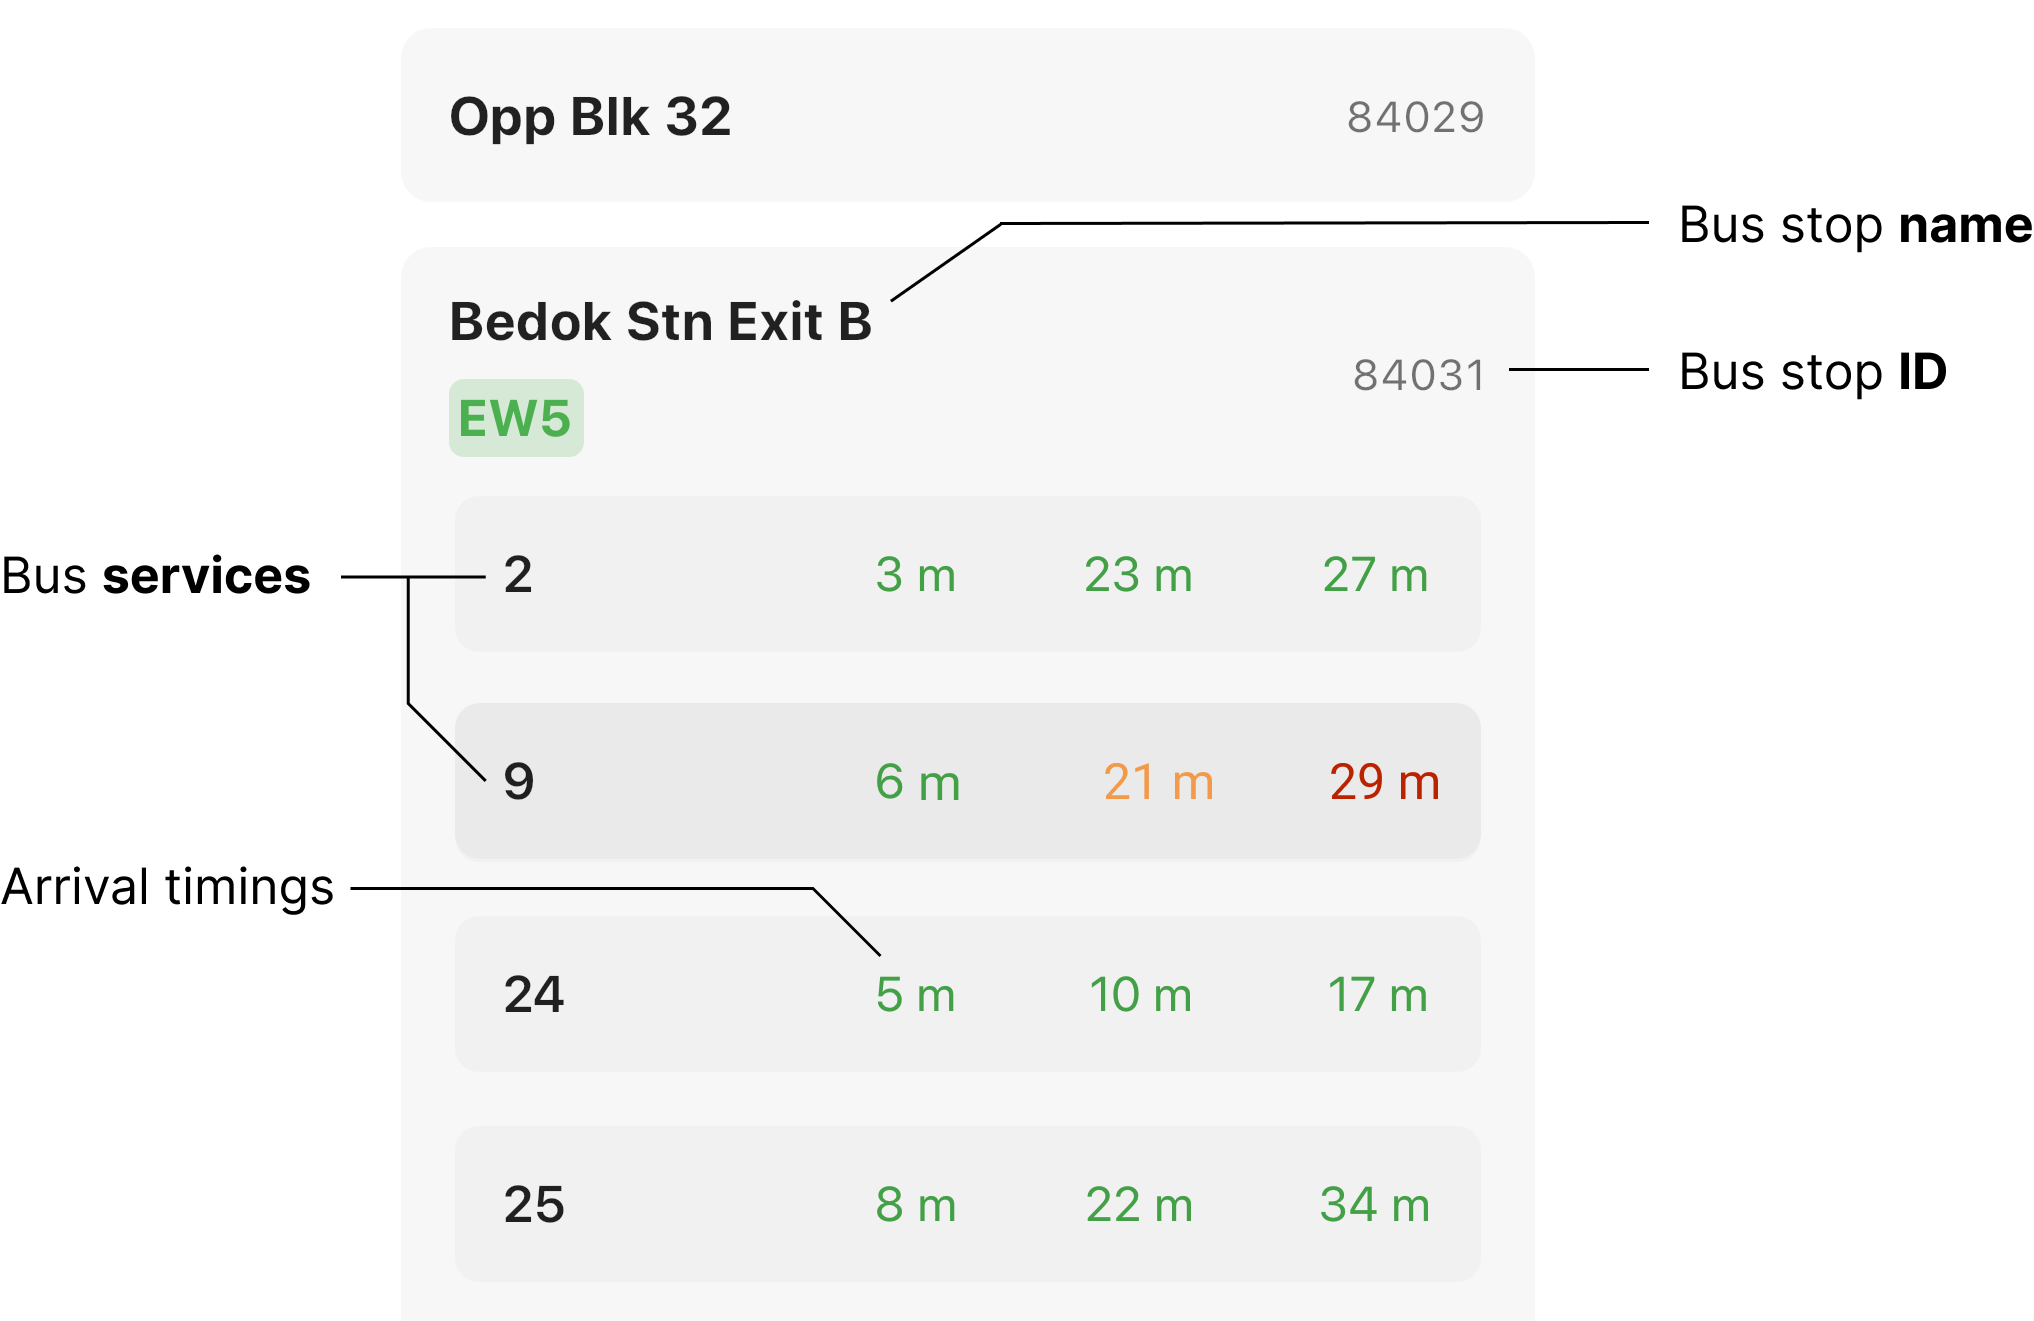
When you open the app, you will see a list of bus stops nearby, based on your current location. Clicking on any of them will reveal a list of bus services:

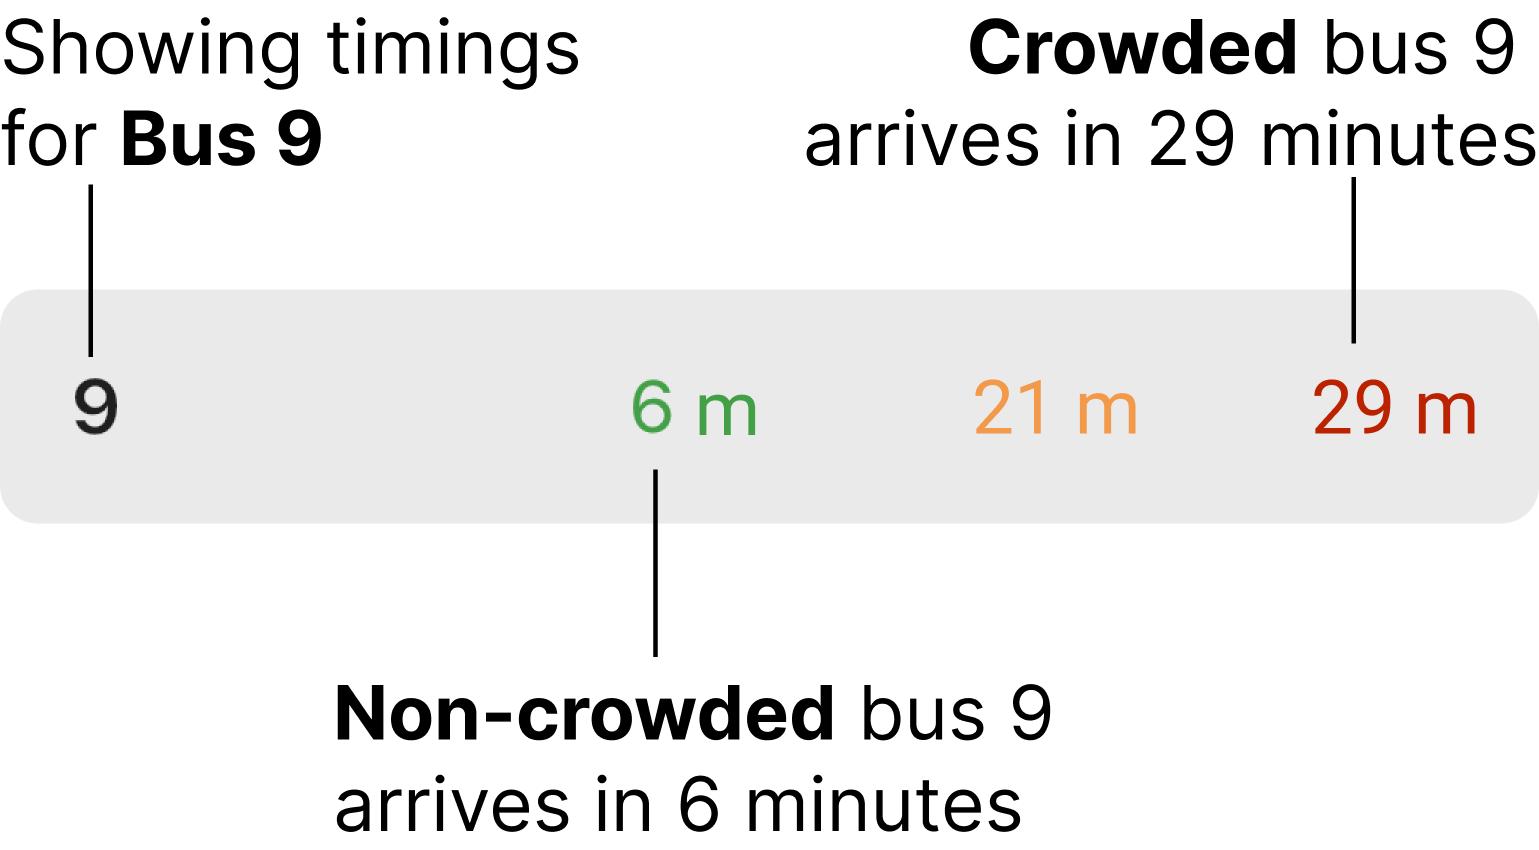
In the above screen, the bus stop Bedok Stn Exit A has the bus servies 2, 9, 24, 25, etc. operating. If, for example, you want to see when bus 9 is arriving, look for 9 in the list of bus services:

The number in black is the bus number (9), and the other three numbers are the bus arrival times. From the image we see the following bus arrival times:
- 6 minutes
- 21 minutes
- 29 minutes
If it says “Arr”, the bus has arrived.
That’s all you need! You may also see the level of crowded of the bus depending on the color of the timings:
- Green: no crowd
- Yellow: little crowd
- Red: overcrowded
2. Adding favorites
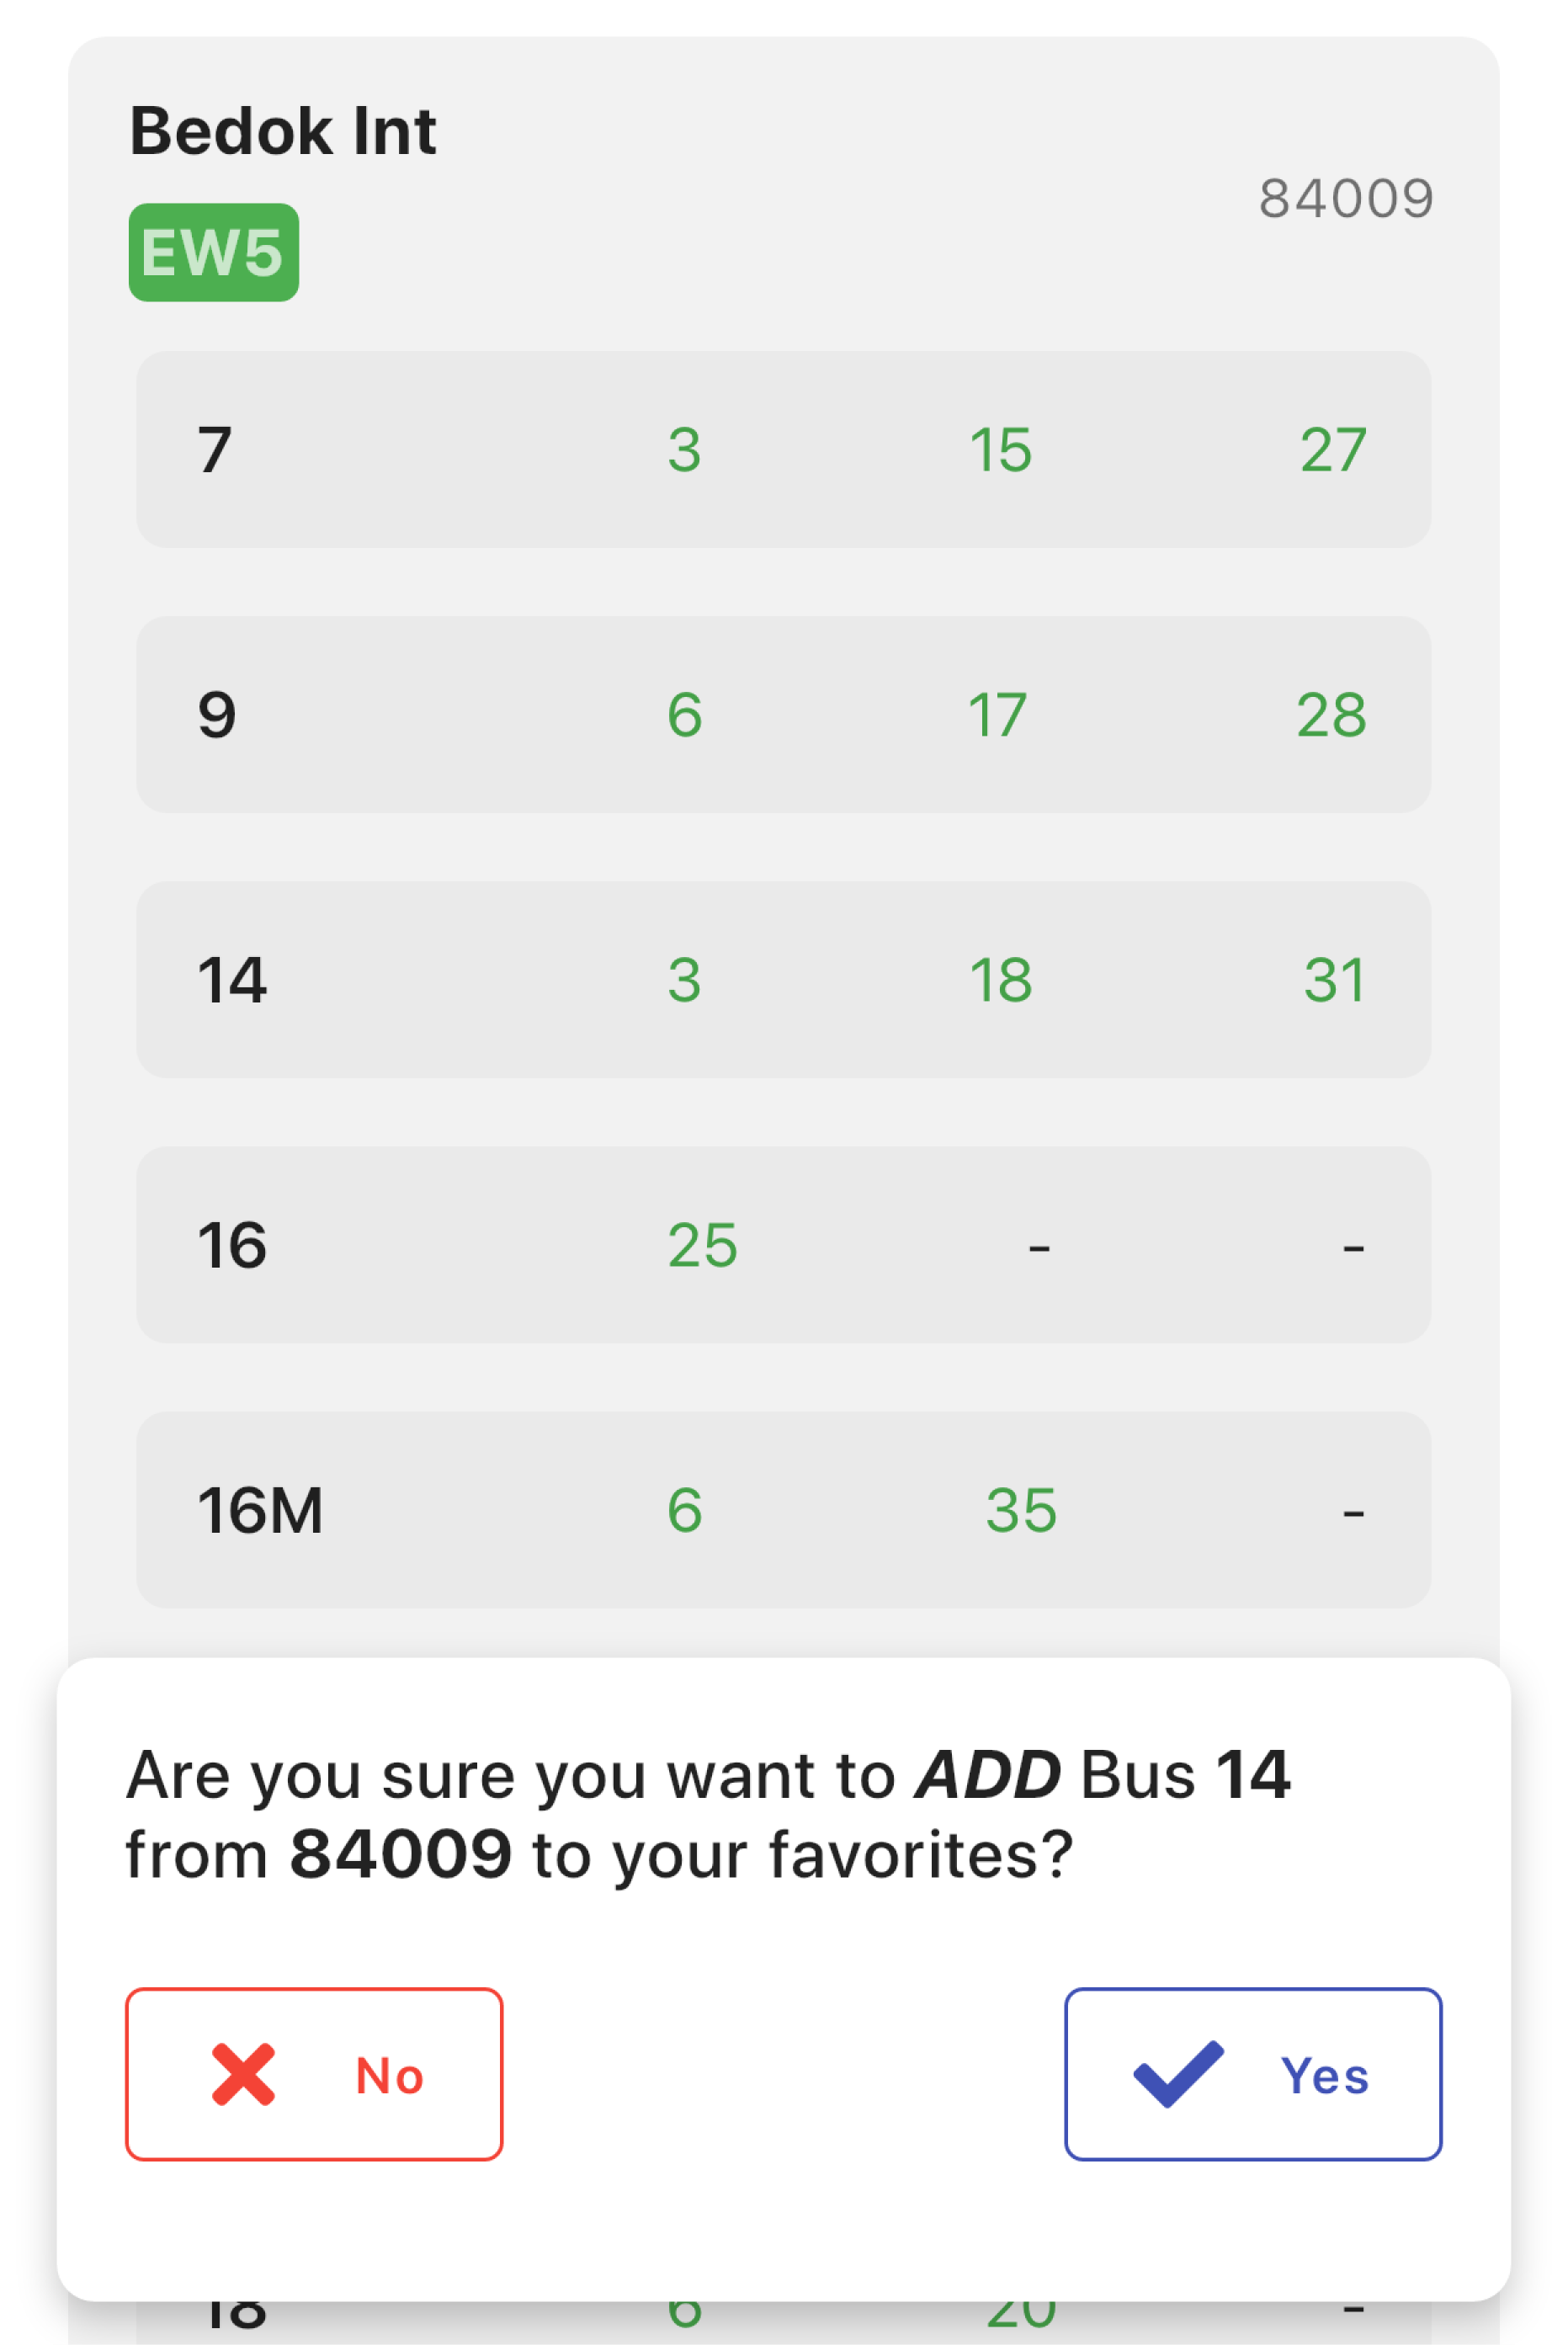
Let’s say you take bus 14 at Bedok Int often. You can add this to your favorites as follows.
First, tap on the on the number 14, and you’ll see a popup to confirm adding the service to your favorites:

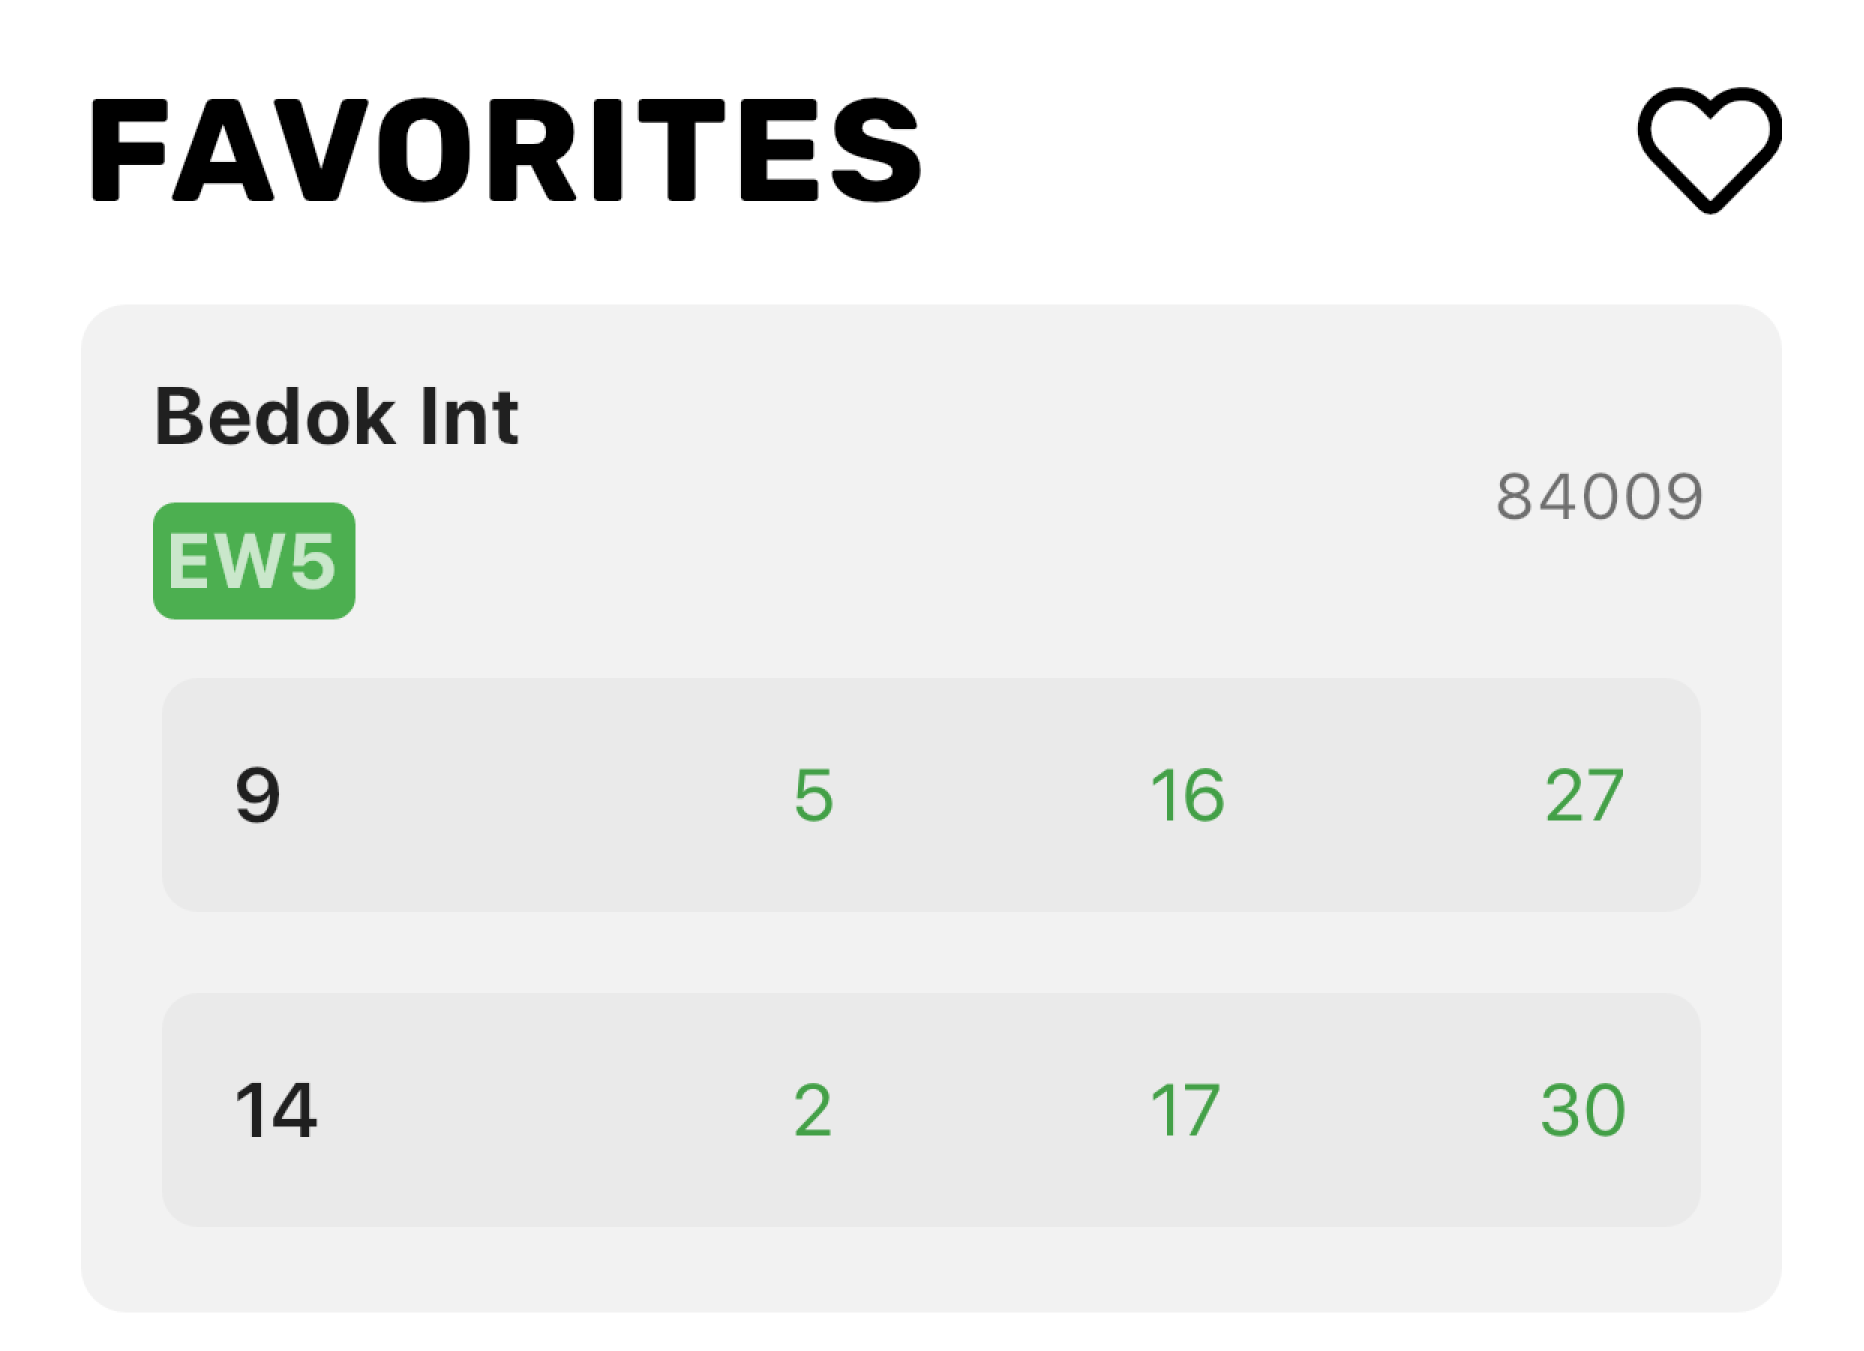
Click on the Yes button to add it. It is possible to add multiple favorites from each bus stop. If, for example, you’ve added buses 9 and 14 from Bedok Int, you will see this in your favorites:

You can add all your frequently used bus services to your favorites.
Location-aware favorites
When you open the app the next time, if you have any favorites that are close to your current location, they will be shown at the top of the screen.
If none of your favorites are nearby, the app will show you a list of all near by bus stops.
3. Discover other features!
Don’t forget to check out:
- Dark theme: choose a theme that pleases your eyes
- MRT map: no need for another app just for an MRT map
- Custom names for favorites